I’ve been wondering how to best set up a local testing environment for some time. My production servers are all on CentOS. On the advice of Nolan Erck, whom I met at CFCamp this year, I’ve decided to use VMWare to set up a CentOS server on a virtual machine here in the office. This approach allows me to have multiple test environments, and I can easily move them to another machine if needed simply by copying the disk image.
For ease of access, each VM needs a static ip on the local network. It’s not hard to do once you figure it out, but getting all the pieces in place took some hours of digging, trial and error. This post, while specific to VMWare and CentOS 7, is intended to help both my future self and anyone else set up networking quickly and easily in such a scenario. Adapt as necessary for your specific environment.
The obvious first step was to download the ISO image from a CentOS mirror site. I grabbed the minimal install as a nearest approximation to a production environment, and created a VM from it using VMWare on an unused Mac mini we had laying around the office.
On the minimal install, networking isn’t enabled by default. So before I could proceed, I had to figure how to enable networking, and get it working via a static IP. Here’s a summary of what finally worked for me.
1) Figure out what the ethernet device is named by running the command :
1
| |

As you can see, mine was named eno16777736, which is not the RedHat default you may find in many examples online.
2) cd to the directory /etc/sysconfig/network-scripts and run ls to display its files
1 2 | |

3) Look for the configuration file for your ethernet device, mine was named ifcfg-eno16777736 and open it for editing using vm or nano
1
| |
The above screenshot was taken after it was edited. The lines to change or add are:
1 2 3 4 5 6 | |
I found that adding the correct gateway ip was essential. NM_CONTROLLED specifies whether or not this device is controlled by the Network Manager. We are setting the parameters manually here, so this must be no. ONBOOT=yes specifies to connect this network device on boot.
Save the file, exit nano, and run the following command to restart the network:
1
| |
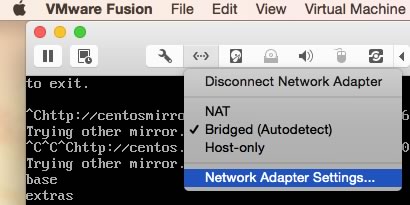
Now CentOS 7 should be setup to network via the static local ip of your choice. But the connection isn’t bridged outside of the VM. After some fiddling around, here’s what worked for me. I went out to the VMWare interface, clicked on the double arrow icon to open the networking menu, and clicked Network Adapter Settings…
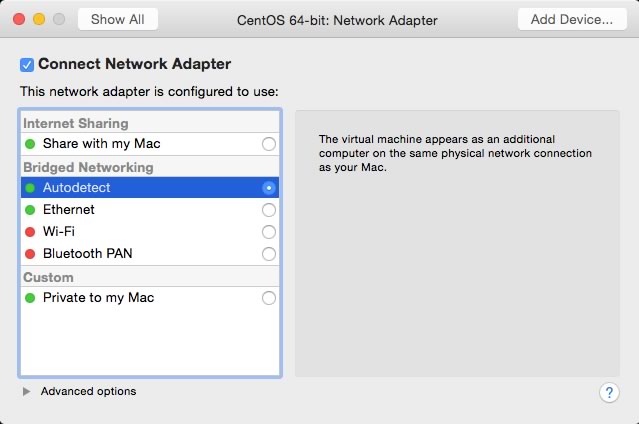
From the menu, I chose Autodetect, as shown below:
Once I had these configuration changes in place, I could access the CentOS instance via SSH and SFTP from my dev machine.
By the way, from my reading, it also seems possible to use the Network Manager to achieve the same end. In this case, you’d leave the config file for your network device alone, and instead run the nmtui command. Search Google for more complete instructions. You’ll still need to bridge the connection through VMWare tho’.
Hope this helps somebody.
PS - If you can access the instance via SSH or SFTP, but cannot from a browser, you may need to either disable and stop firewalld:
1 2 | |
or better, figure out how to configure it properly to allow access via a browser, which I cover in the next article, Exploring CentOS 7 firewalld